NOTE: SQL Server Management Studio is not part of the SQL Server 2016 media anymore Please download it here
1. Download SQL Server 2016 Developer Edition. I downloaded SQL Server 2016 Developer Edition using my MSDN account.

Alternatively you may go this link to get the SQL Server 2016 Evaluation.
2. Right-click then Run SQL Server 2016 setup as administrator.

3. Choose Installation on the left-pane then click New SQL Server stand-alone installation… (the first choice).

4. I’m installing a Developer edition (free) hence there is no need to enter a product key. Click Next.

5. Accept the license terms then click Next.

6. I opted not to tick User Microsoft Updates. Click Next.

7. Ignore the warning about Windows Firewall. This means that the Windows Firewall for Database Engine Access is not yet configured. We can do that later. Click Next.

8. Select the necessary features that you need. You can read the descrption in the feature description box.


9. Choose Default instance if you are not going to create multiple instances of SQL Server on the same machine. Otherwise go for Named Instance. Click Next.

10. Enter the service accounts that you will use to run SQL Services. I’ve set the Startup Type to Automatic for all components.

11. Go to the Collation tab. I’ve accepted the defaults because this is exactly what our application needs. Some application require you to choose a specific collation. You can click Customize to change it. Click Next.

12. I’ve chosen Mixed Mode. This is highly recommended so that there is an additional built in SA accout with a separate user name and password. To add users such as the one I’m using, click Add Current User. to allow account to log into SQL Server.

13. I left the Data Directories to defaults. Though it can be changed if you have a multiple disk environment. Additionally, for better performance, you may want to separate out where different parts of the DBMS go.

14. Configure multiple tempDB data files. This is to increase the I/O throughput to tempdb. When you create multiple data files, they will all be in the primary filegroup and SQL Server uses a proportional fill algorithm to determine which file to use for each request to create an object. If all the files are exactly the same size, then SQL Server uses the files in a “round robin” fashion, spreading the load equally across the files. As a general guideline, create one data file for each CPU on the server and then adjust the number of files up or down as necessary.

15. I did not enable FILESTREAM but you may want to if you plan to explore large file types such as BLOB. Click Next.

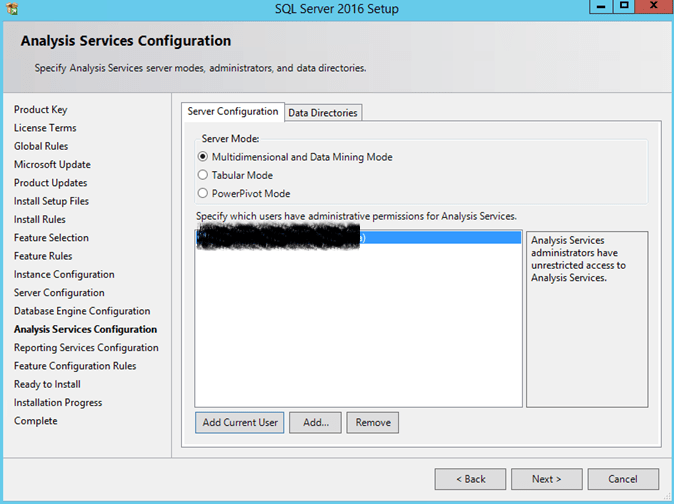
16. If you have selected Analysis Services component, you will be shown with the following screen. Select the Multidimensional and Data Mining Mode. Click Add Current User. Click Next.
17. Leave the Data Directories to default. Click Next.

18. If you have selected Reporting Services component, you will be presented with the following screen. I chose Install only. We will configure it later. Click Next.

19. Review selected features and click Install.

20. Once completed. Click Close.